Installation Wizard
Extract the Installation Package
tar -zxf halo_1.0.16.x86_64.build260326.tar.gz
Run the Installation Script
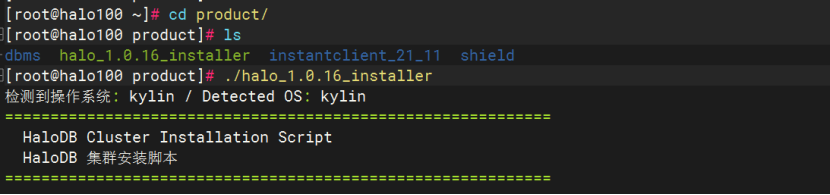
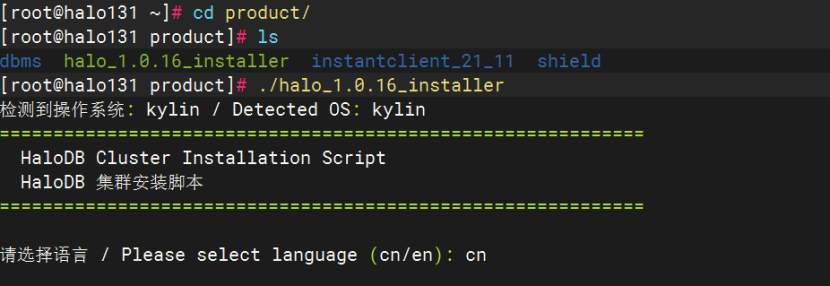
[root@halo131 ~]# cd product/		# Enter the installation directory
[root@halo131 product]# ls
dbms  halo_1.0.16_installer  instantclient_21_11  shield
[root@halo131 product]# ./halo_1.0.16_installer 	# Run the interactive installation script
Detailed Configuration Steps
Step 1: Select Language
Enter en (English) or cn (Chinese, default).
Step 2: Select Installation Type
Available components:
halodb— Install HaloDB databaseetcd— Install etcd key-value storeclustermgr— Install clustermgr management componentall— All components

Step 3: Specify Installation Path
The default path is /u01/app/halo. Press Enter to use the default path, or manually enter a custom path.

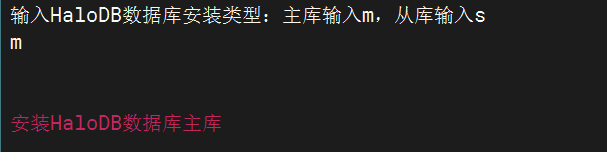
Step 4: Select Database Role
- Enter
mfor primary - Enter
sfor standby
Step 5: Install Database Dependency Packages
The installation script will automatically install the system dependency packages required for database operation (26 packages in total) and automatically complete the following system configurations:
- Modify SELinux configuration
- Disable firewall
- Modify kernel parameters (semaphores)
- Increase user resource limits
Step 6: Create Database User
Whether to delete the existing user halo:
- Enter
yesto delete and recreate - Enter
noor press Enter to keep the existing user
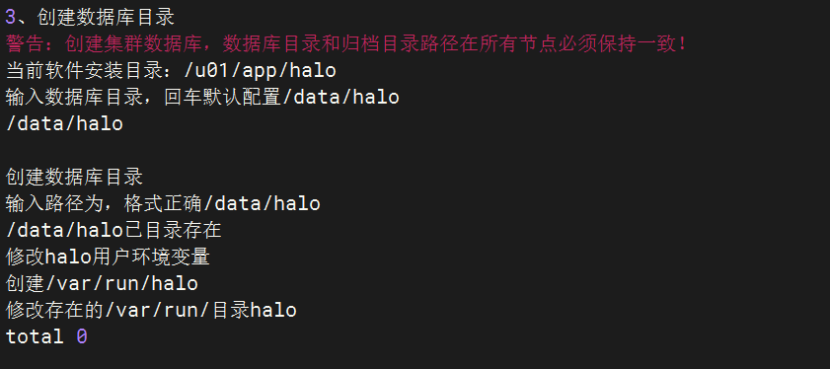
Step 7: Specify Database Directory
Enter the database initialization directory. The default is /data/halo. The directory must be empty and cannot be under / or /root.
Note: The data directory you enter must be empty, otherwise an error will occur.
After the user is created, the script will automatically configure environment variables, create the /var/run/halo process directory, and configure auto-start on boot.
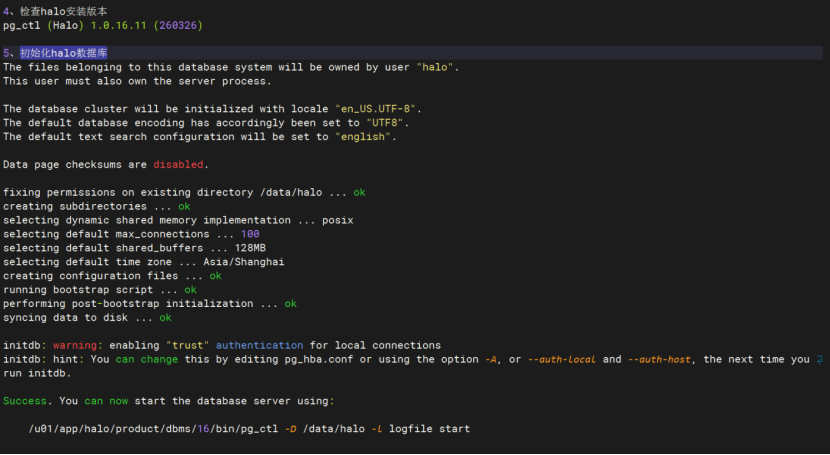
Step 8: Initialize Halo Database
The script will automatically perform the following operations:
- Check database version:
pg_ctl -V - Initialize database:
pg_ctl init -D $PGDATA - Configure database parameters:
pg_hba.conf,postgresql.conf
Step 9: Configure Archive Logs
Choose whether to configure archive logs. Enter the archive path. The default path is $PGDATA/archivedir (press Enter to use the default).

Step 10: Copy license.lic
Copy the license file to the database directory.

Step 11: Start Halo Database
The script automatically starts the database service.

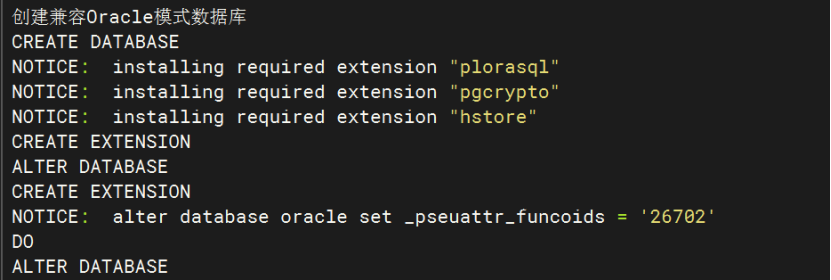
Step 12: Compatibility Mode Database Creation
You can choose to create databases with the following compatibility modes:
PostgreSQL Compatibility Mode:

Oracle Compatibility Mode:
Select Oracle mode and enter the port (default 1521, customizable). The database oracle is automatically created, and the following extensions are installed: aux_oracle, querymap, dbms packages, etc.

MySQL Compatibility Mode:
Select MySQL mode and enter the port (default 3307, customizable). Schema and user are automatically created, and the aux_mysql extension is installed.
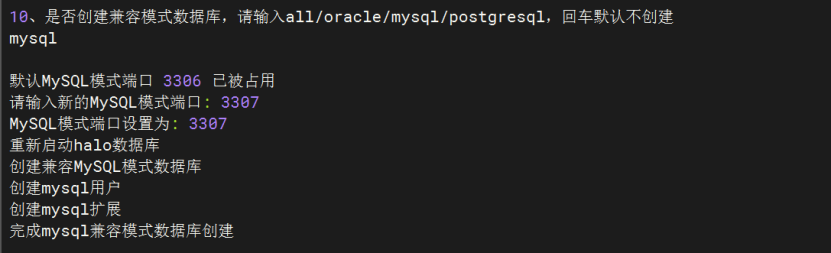
All Compatibility Modes:
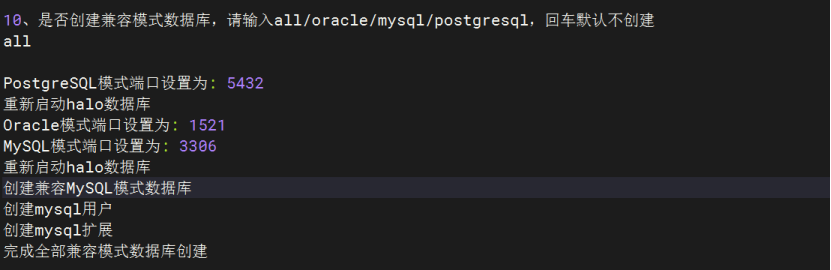
All the above compatibility modes can be installed simultaneously.
Step 13: Configure Huge Pages (Optional)
When system memory is >= 32GB, you can configure huge pages to improve performance:
- Modify the
vm.nr_hugepagesparameter - Enable
huge_pages = on - Restart the database
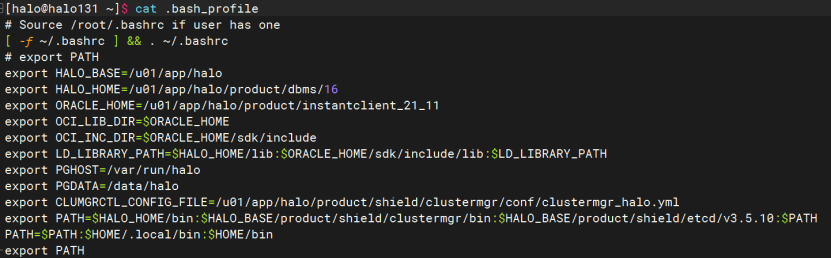
View Environment Variable Configuration
After installation is complete, you can view the halo user's environment variables:
cat /home/halo/.bash_profile